


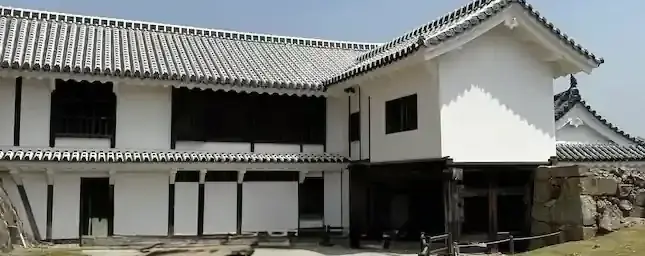
Area 4: East Bailey and Okiku’s Well
Where Himeji Castle’s haunting legends meet its hardened final defenses — from the Bizenmaru compound beneath the Main Keep to the eerie, storied Okiku’s Well.
Area 4 brings together Himeji Castle’s haunting legends and hardened military defenses. From the stark stone foundations of the Taimensho audience hall to the solemn Harakirimaru compound, this area was once the domain of high-ranking retainers and formal ceremony.
Among the fortified gates, turrets, and guardhouses, you’ll also find the famous Okiku’s Well, tied to one of Japan’s most chilling ghost stories. The mix of spiritual echoes and defensive strength gives this area a unique atmosphere — equal parts historical depth and emotional resonance.
Ruins of the Taimensho
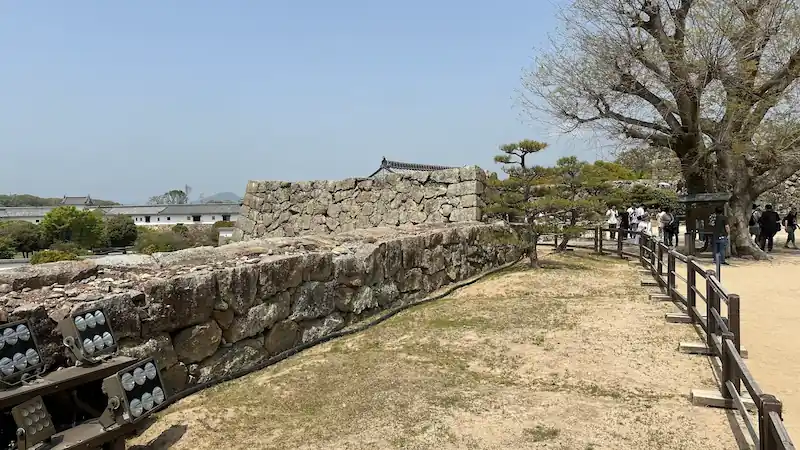
The Taimensho Ruins mark the site where Himeji Castle’s daimyo once formally received vassals and official guests. The Taimensho (Audience Hall) served as a key location for political and ceremonial functions within the castle grounds. Although the original structure no longer stands — destroyed by fire in 1882 (Meiji 15) — the site is clearly marked with informational signage, preserving the memory of feudal governance and the daily workings of the samurai elite.
| Year built | Early 17th century (Edo period) |
|---|---|
| Builder | Ikeda Terumasa |
| Current status | Ruins remain; structure lost to fire in 1882 |
Access: Approx. 1-minute walk (60 m) from I-no-Watari-Yagura
Suggested time: Brief visit ~10 min / deeper exploration ~30 min
Bizenmaru Compound 🎥 360°
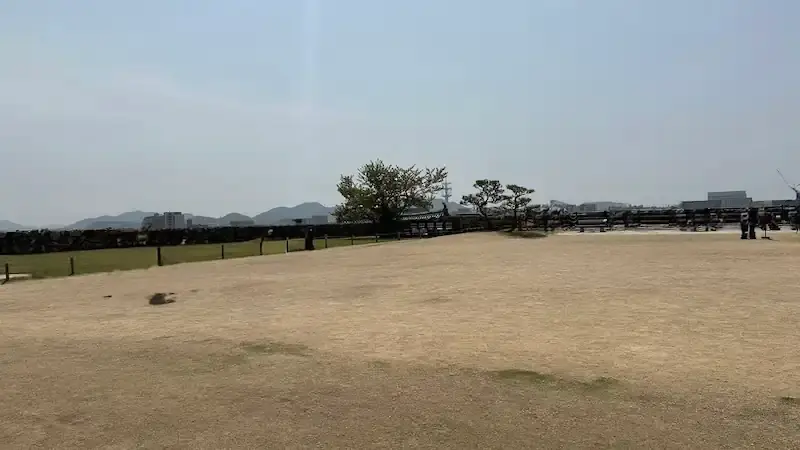
Bizenmaru is the elevated compound housing the base of the Main Keep — the central and most fortified area of the entire complex. The name “Bizen” is thought to honor Bizen Province (present-day Okayama), possibly because Ikeda Terumasa’s second son, Tadatsugu, ruled that province — rather than because Terumasa himself was from Bizen. Centered around the high stone walls of the tenshu platform, Bizenmaru is protected by the Bizen Gate, the Water Gate series, the main keep entrance, and various turret ruins and well sites — only those who pass a series of gates, baileys, and trap spaces can reach this “final stronghold.” It also offers one of the closer, more representative views of the main keep, making it a popular photo spot.
| Year built | 1601–1609 |
|---|---|
| Builder | Ikeda Terumasa |
| Structure / features | Residential compound at the base of the main keep, featuring ōgi-no-kōbai style stone walls resembling an open fan |
| Current status | Destroyed by fire in 1882 |
Access: Approx. 1-minute walk (50 m) from Ruins of the Taimensho
Suggested time: Quick look ~10 min (main keep exterior only) / in-depth tour ~20 min
Bizen-mon Gate
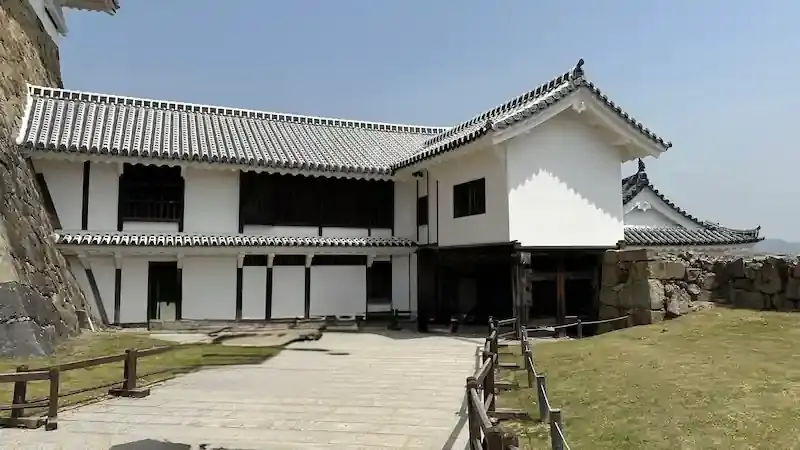
Bizen-mon Gate provides direct access into the Bizenmaru enclosure from the east-side approach route — it is considered the only gate leading directly into Bizenmaru from that direction, rather than a gate attached to the Main Keep itself. The name “Bizen” is thought to honor Bizen Province, possibly because Ikeda Terumasa’s second son, Tadatsugu, ruled that province. Set within a masugata structure, it was designed to trap intruders for flanking attacks. Once through the gate, visitors enter the interior of Bizenmaru, with the Main Keep close ahead.
| Year built | 1601–1609 |
|---|---|
| Builder | Ikeda Terumasa |
| Structure / features | Gate constructed using a stone coffin due to material shortages; leads into Bizenmaru |
| Current status | Still standing |
Access: Approx. 1-minute walk (77 m) from Bizenmaru Compound
Suggested time: Quick pass-through ~5 min / in-depth ~10 min
He-no-mon Gate
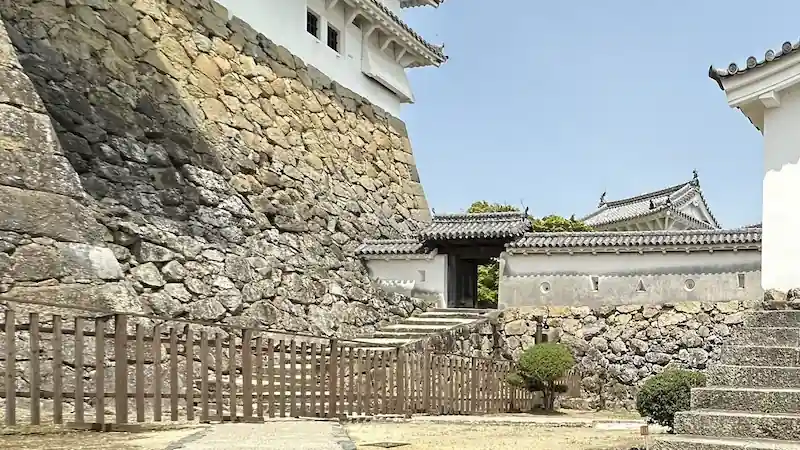
He-no-mon Gate is one of the gates along the Kitakoshi-kuruwa (North Bailey) side approach route, part of the “i–ro–ha…” gate sequence — rather than the final gate right before the Main Keep. Built in the koraimon style and nestled between stone walls and narrow pathways, it functioned to obstruct and slow enemy progress on that route. Today, visitors do not enter through He-no-mon — the current route leads through the Water Gates instead — and access is not part of the standard visitor route.
| Year built | Early 17th century |
|---|---|
| Builder | Ikeda Terumasa |
| Current status | Still standing (not part of the standard visitor route) |
Access: Not part of the standard visitor route; may be seen during special guided tours or openings
Suggested time: Quick look ~3 min / in-depth ~10 min (when accessible)
Tono-ichimon Gate
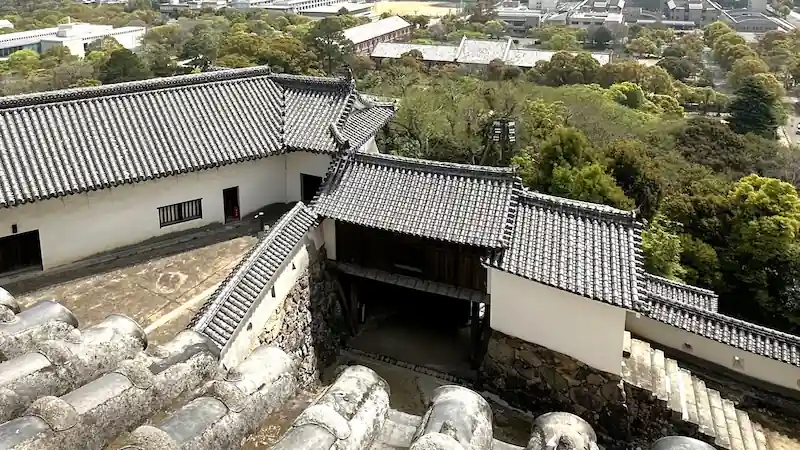
Tono-ichimon (Gate To-1) is one of a series of gates named according to the traditional iroha syllabary. Located west of the Bizenmaru enclosure, it forms part of the karamete-michi, the rear approach route built for tactical flexibility and emergency use, alongside gates like Tono-nimon and Tono-yonmon on this secondary defensive line. Uniquely, it is constructed from unplastered wood, setting it apart from the predominantly white-plastered gates elsewhere in the complex — its design has led some historians to speculate it may have been relocated from another site, such as Okishio Castle, though this remains unconfirmed. It is not on the standard visitor route.
| Year built | Early 17th century |
|---|---|
| Builder | Ikeda Terumasa |
| Current status | Still standing (not currently accessible to visitors) |
Access: Not accessible; may occasionally be viewable during special openings or guided tours
Suggested time: Quick look ~5 min / in-depth ~10 min (when accessible)
Former Bansho (Guardhouse)
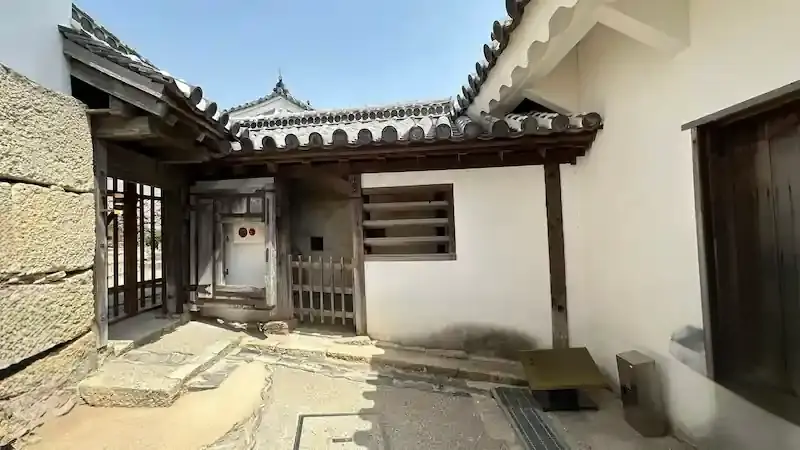
The Former Bansho, or guardhouse, served as a critical checkpoint during the Edo period, manned by samurai and officials responsible for monitoring the movement of people and goods within the castle. The structure exemplifies the administrative and defensive mechanisms of feudal Japan, offering insight into the daily operations that maintained order within the castle. Its current structure’s exact fate through the Meiji-era reforms is not clearly documented.
| Year built | Early 17th century |
|---|---|
| Builder | Ikeda Terumasa |
| Cultural property status | Part of Himeji Castle, a UNESCO World Heritage Site |
Access: Approx. 0-minute walk from Bizen-mon Gate
Suggested time: Quick highlights ~10 min / in-depth exploration ~20 min
Ikaku Yagura
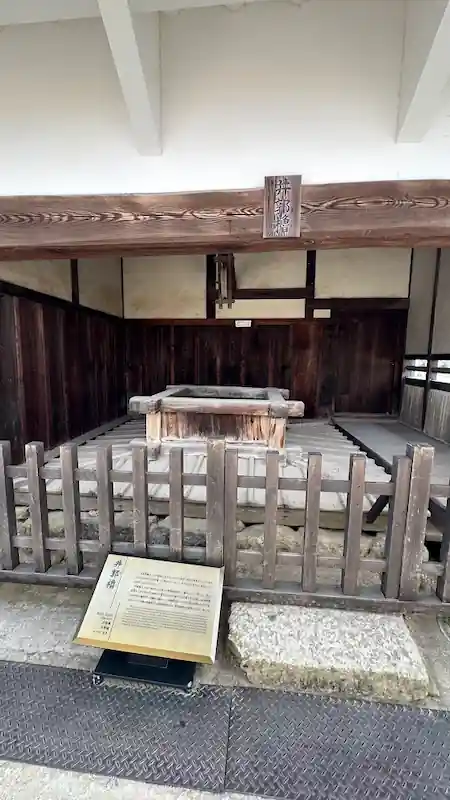
Ikaku Yagura (井郭櫓) is a turret within the castle grounds, constructed in the early 17th century during the Momoyama-to-Edo transition. This single-story structure with a tiled roof exemplifies the architectural style of the era, having played a role in the castle’s defense system by overseeing key access points and providing a strategic vantage for monitoring and protection.
| Year built | 1601–1609 (Momoyama period) |
|---|---|
| Builder | Ikeda Terumasa |
| Structure / features | Single-story turret with tiled roof; strategic location for defense and surveillance |
| Current status | Original structure remains intact |
Access: Approx. 0-minute walk from Former Bansho (Guardhouse)
Suggested time: Quick highlights ~10 min / in-depth exploration ~20 min
Osakabe Shrine Ruins
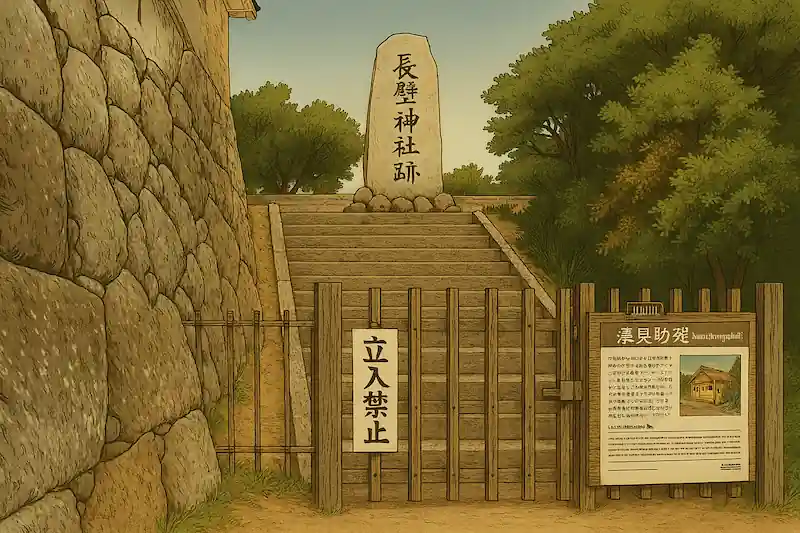
Nestled within the eastern perimeter of the castle, the Osakabe Shrine Ruins (長壁神社遺趾) mark the site historically dedicated to the deified spirits of Prince Osakabe, son of Emperor Kōnin, and his daughter, Princess Tomihime — revered as guardian deities of Mount Hime (姫山) and important to successive lords of Himeji Castle. Over the centuries the shrine underwent several relocations and reconstructions, and in 1914 (Taishō 3) a stone monument was erected to commemorate the original site, preserving its legacy even as the physical structures faded.
| Year built | Ancient origins; commemorative monument erected in 1914 |
|---|---|
| Builder | Unknown; monument established by local authorities |
| Current status | Monument remains intact; original shrine structures no longer exist |
Access: Not accessible
Suggested time: Quick highlights ~10 min / in-depth exploration ~20 min
Obi-no-Yagura (“The Belt Turret”)
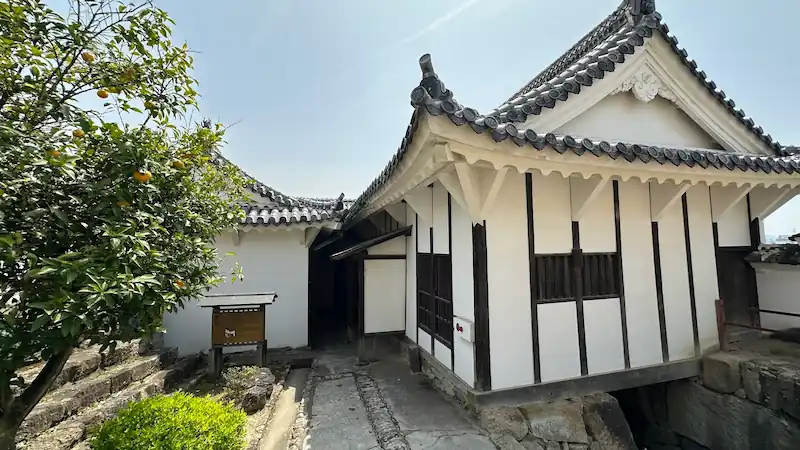
Obi-no-Yagura, or “Belt Turret,” is a single turret building with a folded, angled floor plan standing atop one of the castle’s highest stone walls, in the Harakirimaru (Idokuruwa) area of the East Bailey — its long, narrow silhouette tracing the edge of the stone wall like a belt is the source of its name. Rather than a connecting corridor linking the small keeps around the Main Keep, it functioned as a defensive strongpoint in its own right, equipped with loopholes for firearms (sama) and stone-drop openings (ishiotoshi) that allowed defenders to delay and repel enemy advances along the East Bailey’s rear approach.
| Year built | Early 17th century |
|---|---|
| Builder | Ikeda Terumasa |
| Structure / features | Single turret building with a folded floor plan atop a high stone wall, resembling a belt; used for defense |
| Current status | Still standing |
Access: Approx. 1-minute walk (25 m) from Ikaku Yagura
Suggested time: Quick look ~10 min (while passing through) / in-depth ~20 min
Harakirimaru (Idokuruwa / Well Bailey) 🎥 360°
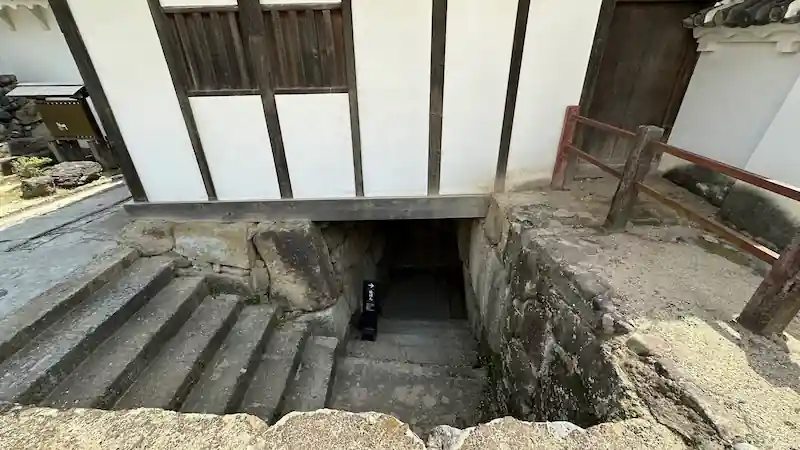
Harakirimaru (腹切丸) is a nickname for a small enclosed compound whose formal name is Idokuruwa (Well Bailey) — a pocket-shaped bailey centered on a well, with a single entrance, at the foot of Obi-no-Yagura’s high stone wall. It was once popularly thought to be a site for seppuku, but castle experts suggest it was actually a defensive post, and that the “seppuku” story is folklore rather than documented history. The “Harakirimaru” nickname is believed to have become widespread only after the site’s public opening in the Taisho era (1912–1926), rather than reflecting an actual historical execution ground. The name likely arose from the area’s secluded atmosphere and the presence of a well, evoking imagery associated with such acts. The courtyard’s design, with its single entrance and enclosed nature, reflects the strategic defensive planning characteristic of Edo-period castles.
| Year built | Early 17th century |
|---|---|
| Builder | Ikeda Terumasa |
| Structure / features | Enclosed, pocket-shaped bailey (Idokuruwa) at the foot of Obi-no-Yagura’s high stone wall; features a central well and single entrance |
| Current status | Structures remain intact and accessible to visitors |
Access: Approx. 1-minute walk (15 m) from Obi-no-Yagura
Suggested time: Quick highlights ~15 min / in-depth exploration ~30 min
Taiko Yagura North Earthen Wall 🎥 360°
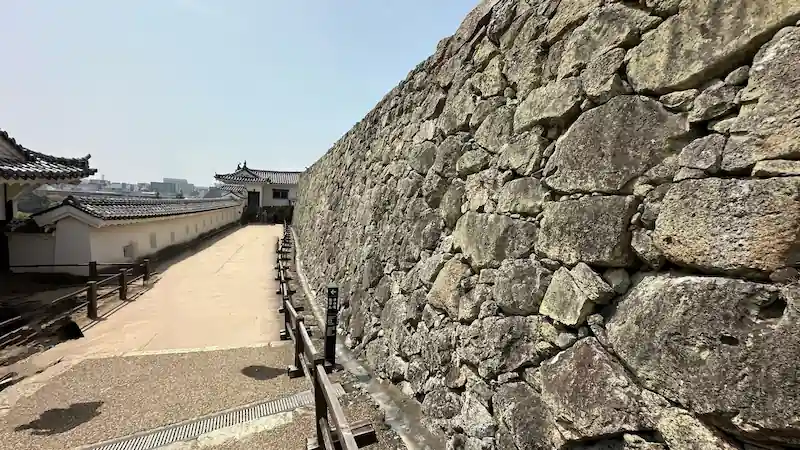
The Taiko Yagura North Earthen Wall (太鼓櫓北方土塀) is a significant defensive structure exemplifying the strategic architectural design of the early Edo period. Constructed between 1601 and 1609 under Ikeda Terumasa, this wall — recorded in cultural-property documentation at roughly 35 meters long with sixteen gunports (狭間) — is topped with traditional tiled roofing (本瓦葺). Positioned north of the Taiko Yagura (Drum Turret), the wall allowed defenders to monitor and repel potential intruders approaching from the north.
| Year built | Early 17th century (Edo period) |
|---|---|
| Builder | Ikeda Terumasa |
| Structure / features | 35-meter earthen wall with sixteen gunports, adjacent to the Taiko Yagura (Drum Turret) |
| Cultural property status | Designated an Important Cultural Property in 1931 |
Access: Approx. 1-minute walk (8 m) from Harakirimaru
Suggested time: Quick highlights ~10 min / in-depth exploration ~20 min
Ri-no-mon Gate

Ri-no-mon stands in Kamiyamasato, part of the phonetic gate sequence (i–ro–ha–ni–ho–he–to…). An ink inscription on one of its posts dates its construction to 1599 (Keichō 4) — before Ikeda Terumasa’s 1601–1609 reconstruction, making it a rare surviving trace of the castle from the earlier Toyotomi-era, under Kinoshita Iesada. Set within a masugata and flanked by imposing stone walls, it forces intruders into a narrow path exposed to attack from the sides and above.
| Year built | 1599 (Keichō 4), predating Ikeda Terumasa’s reconstruction |
|---|---|
| Builder | Toyotomi-era construction under Kinoshita Iesada |
| Structure / features | Gate in Kamiyamasato, one of the entrances along the castle’s approach routes |
| Current status | Still standing |
Access: Approx. 1-minute walk (15 m) from Taiko Yagura North Earthen Wall
Suggested time: Quick look ~3 min / in-depth ~10 min
Taiko Yagura (Taiko Turret / Heno Yagura)
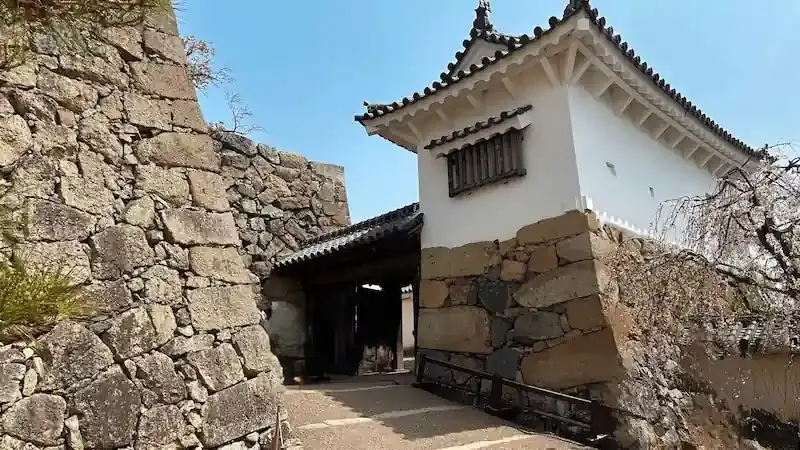
The building currently called “Taiko Yagura” is in fact He-no-Yagura, a two-tiered turret standing along the approach route in Kamiyamasato — not a corridor turret connecting the Main Keep and East Small Keep. Its familiar name comes from a large drum (taiko) once housed here, said to have been moved from an older, no-longer-existing three-story turret that stood near the castle’s original main gate — a separate building from a different era. This present building is believed to have started being called “Taiko Yagura” only from the modern era onward. The drum, wherever housed, was used to signal opening and closing times, fires, and emergencies. Constructed with a two-tiered timber frame and exposed beamwork, it showcases Japanese wooden construction in a non-combative, logistical role.
| Year built | Early 17th century (Edo period) |
|---|---|
| Builder | Ikeda Terumasa |
| Structure / features | He-no-Yagura, a two-tiered turret in Kamiyamasato; the “Taiko” (drum) name is a later attribution, transferred from an earlier, non-extant turret near the old main gate |
| Cultural property status | Important Cultural Property |
Access: Approx. 1-minute walk (4 m) from Ri-no-mon Gate
Suggested time: Quick look ~3 min / in-depth ~10 min
Okiku’s Well (Okiku Ido)
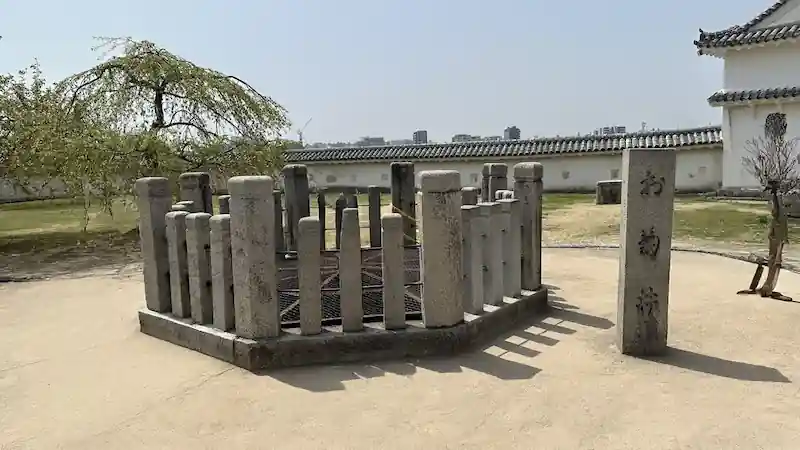
Located at the center of Kamiyamasato, Okiku’s Well is a deep, stone-lined well associated with one of Japan’s most famous ghost stories — the tragic legend of Okiku, a servant falsely accused of losing one of ten valuable heirloom plates, thrown into a well, whose restless spirit is said to eternally count: “One… two… three…” The well’s original name was Tsurube-tori Ido. The story gained widespread recognition through the kabuki play Banchō Sarayashiki and is counted among Japan’s “Three Great Ghost Stories” (Nihon San Dai Kaidan) — though that tale’s roots lie in Edo’s Banchō district, and its attachment to this specific well is said to have become established only from the late Meiji era onward, rather than continuously since the Edo period. The well itself, measuring about 1 meter across and roughly 20 meters deep, still exists in its original form, remaining a powerful symbol of feminine tragedy in samurai-era society.
| Year built | Unknown |
|---|---|
| Builder | Unknown |
| Structure / features | Stone-lined well approximately 1 m across and 20 m deep, originally named Tsurube-tori Ido, associated with the legend of Okiku since the late Meiji era |
| Current status | Still present within the castle grounds |
Access: Approx. 1-minute walk (55 m) from Taiko Yagura
Suggested time: Quick look ~5 min / in-depth ~15 min (legend exploration and atmospheric stroll)
- Ruins of the Taimensho
- Bizenmaru Compound 🎥 360°
- Bizen-mon Gate
- He-no-mon Gate
- Tono-ichimon Gate
- Former Bansho (Guardhouse)
- Ikaku Yagura
- Osakabe Shrine Ruins
- Obi-no-Yagura (“The Belt Turret”)
- Harakirimaru (Idokuruwa / Well Bailey) 🎥 360°
- Taiko Yagura North Earthen Wall 🎥 360°
- Ri-no-mon Gate
- Taiko Yagura (Taiko Turret / Heno Yagura)
- Okiku’s Well (Okiku Ido)
- FAQ
- Himeji Castle Map
- More on Himeji Castle
- Return to the Warlord Page
FAQ
Okiku’s Well, located at the center of Kamiyamasato and originally named Tsurube-tori Ido, is tied to the legend of a servant named Okiku, falsely accused of losing an heirloom plate and thrown into the well. Her ghost is said to eternally count plates, a story popularized by the kabuki play Banchō Sarayashiki and counted among Japan’s Three Great Ghost Stories — though the tale’s attachment to this specific well is said to date only from the late Meiji era onward, not continuously since the Edo period.
No. Harakirimaru’s formal name is Idokuruwa (Well Bailey). Despite the nickname, castle experts believe it was actually a defensive post, and that the seppuku association is folklore rather than documented history — likely arising from the area’s secluded atmosphere and its well, with the “Harakirimaru” nickname becoming widespread only after the site’s Taisho-era public opening.
Walking through all 14 spots, including the Bizenmaru compound, the final gate maze, and Okiku’s Well, typically takes 60–90 minutes.
Himeji Castle Map
More on Himeji Castle
Return to the Warlord Page


☕ Support This Site
Following the Shogun is built on original fieldwork and on-site research.
If you found this guide useful, your support helps keep it going.

You can also support via QR code


comment