


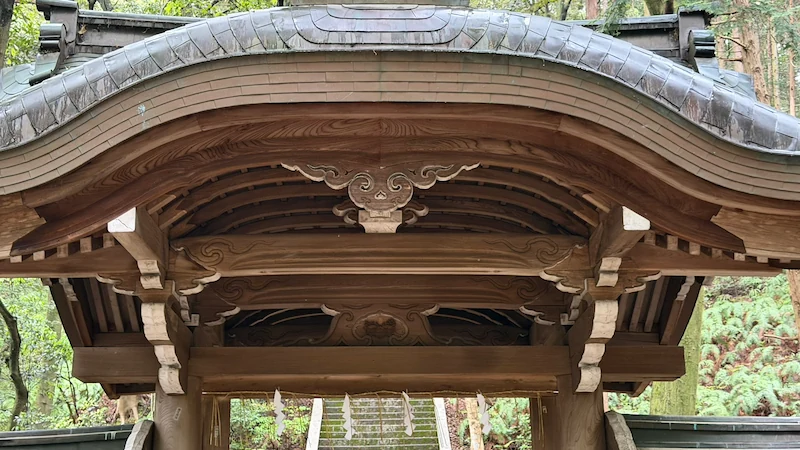
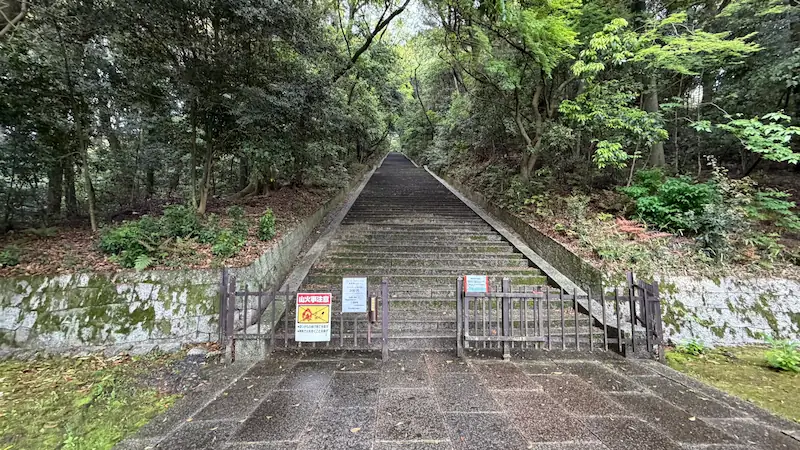
On Mt. Amidagamine in eastern Kyoto, a long stone stairway leads to the burial site of Japan's great unifier. Not a shrine — a grave.
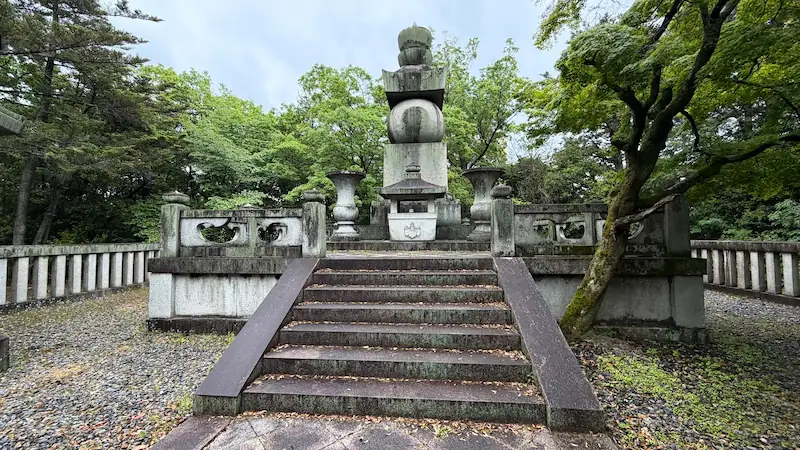
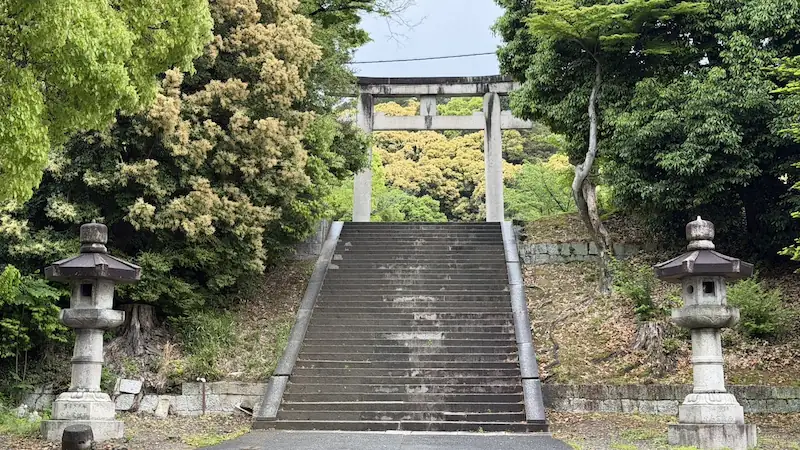
Toyokuni Byo is the mausoleum of Toyotomi Hideyoshi, the 16th-century ruler who unified Japan. It stands on Mt. Amidagamine in eastern Kyoto and is reached by a long stone stairway through the forest.
This is not Toyokuni Shrine. Toyokuni Byo is the burial site itself: a mountain grave area crowned by a large five-ring stone pagoda. The visible mausoleum structures were rebuilt in 1897, during the Meiji period, for the 300th anniversary of Hideyoshi's death.
Quick Visit Summary
Hideyoshi's mausoleum on Mt. Amidagamine, separate from Toyokuni Shrine.
Hilltop grave area, large gorinto, stairway, related markers and views.
Current visible mausoleum structures date to Meiji 30 (1897).
Approx. 30 min for Toyokuni Byo alone on this visit. Stair climb: approx. 10 min base to top for a fast walker.
City Bus No. 206 from Kyoto Station to Higashiyama Nanajo stop. Or Keihan Shichijo Station (KH37) on foot.
200 yen, based on the on-site notice during this visit.
Solid shoes required. Natural stone steps, no non-slip treatment. Downhill can be slippery.
Is It Worth Visiting?
Who should visit Toyokuni Byo?
Based on this visit, Toyokuni Byo is particularly well suited for visitors with a strong interest in Toyotomi Hideyoshi, the Sengoku period, or quiet historical sites away from Kyoto's main tourist circuit.
- Visitors interested in Toyotomi Hideyoshi or the Sengoku period
- People visiting Hideyoshi-related sites across Japan
- Travelers who prefer quiet, historically significant places
- Visitors looking for something beyond the main sightseeing route in east Kyoto
It is not a polished, easy-access attraction. The experience is walking up a long stairway through dense trees to reach a burial site. During this visit, there was almost no one else present — the atmosphere was still and solitary.
How to Get to Toyokuni Byo
Access Standard Block
| Nearest station | Keihan Line Shichijo Station (KH37). About 15-25 minutes on foot from the station, depending on the source; this site's own on-site walk during the visit took about 25 minutes |
|---|---|
| Nearest bus stop | Higashiyama Nanajo (Kyoto City Bus). About 5-15 minutes on foot from the stop, depending on the source; this site's own on-site walk during the visit took about 15 minutes |
| Practical Shinkansen gateway | Kyoto Station |
| Travel time from major cities | From Tokyo: about 2 hours 15 minutes to Kyoto Station by Nozomi Shinkansen. From Nagoya: about 35-50 minutes by Nozomi. From Shin-Osaka: about 15 minutes to Kyoto Station on a conventional line. General estimates; actual times vary by train and time of day |
| Local difficulty | A long stone stairway leads from the entrance to the hilltop grave area. Not a flat-access site |
| Recommended transport | City Bus No. 206 to Higashiyama Nanajo, or Shichijo Station on the Keihan Line. A taxi to the entrance is practical if you want to save energy for the climb |
| Parking | According to a third-party website, on-site parking is available (about 80-100 spaces, 500 yen per visit, open 7:30-17:30). Not confirmed on an official source; verify before visiting |
| Reception hours | According to a third-party website, 8:30-17:00. Not confirmed on an official source; verify before visiting |
| Admission | 200 yen, based on the on-site notice during this visit (May 2026). Subject to change — confirm with on-site signage or official sources |
| Number of steps | According to third-party sources, roughly 489-500 steps. Not an official figure; unconfirmed |
| Notes | Natural stone steps with no non-slip treatment. The descent can be slippery. Difficulty increases significantly in rain |
From Kyoto Station, one practical route is Kyoto City Bus No. 206 to Higashiyama Nanajo, followed by a walk to the entrance area. Alternatively, use Shichijo Station on the Keihan Line (KH37) and walk. A taxi to the entrance is also a practical option.
What Remains Today at Toyokuni Byo?
Mt. Amidagamine Hilltop Burial Site 🎥 360°
阿弥陀ヶ峰の墓所 — with the Five-Ring Stone Pagoda (Gorinto)
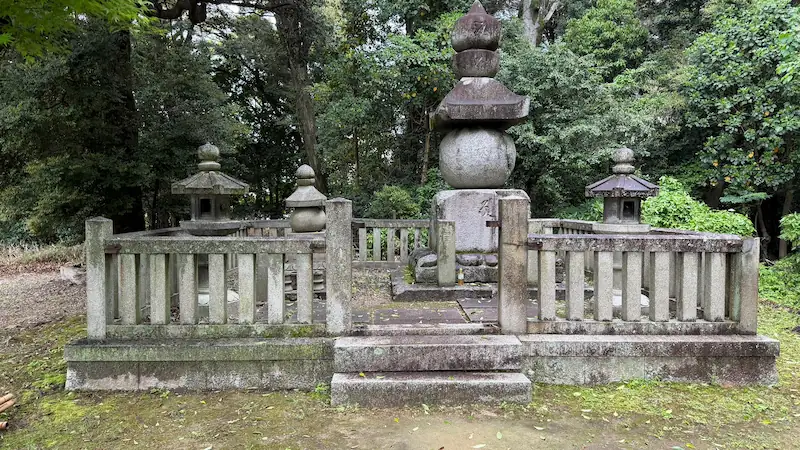
Toyokuni Byo is the burial site of Toyotomi Hideyoshi on Mt. Amidagamine. If you have not read about this place before visiting, the scale of the commitment — climbing a long stairway to reach a mountain burial site — can be unexpected. The current grave area is a Meiji-era reconstruction, and its visual centerpiece is a large five-ring stone pagoda (gorinto), built in 1897 for the 300th anniversary of Hideyoshi's death.
From this visit: "The moment the grave mound came into view after the long climb — it immediately felt real."
Gorinto Details
Built: 1897 (Meiji 30), confirmed. The gorinto's precise height, weight, and designer are not confirmed in this article.
The Toyotomi-era mausoleum itself is not treated as extant. Based on the historical record, this article presents the current site as a reconstruction.
Stone Stairway (Approach Steps)
登拝道 — The climb to the grave
The stairway runs in a straight line throughout. Steps are natural stone without non-slip treatment. The approach is heavily forested, creating a dark, enclosed atmosphere even during daytime.
Stairway Details
Base to grave area
Approx. 10 minutes on this visit for a fast walker
Surface
Natural stone steps, no non-slip treatment
Difficulty
Downhill can be slippery; allow extra time
Number of steps
Third-party sources cite roughly 489-500 (unconfirmed)
Taiko-daira Area 🎥 360°
太閤平 — A broad area on the approach
Taiko-daira appears as a broader area on the approach to the mausoleum. Details and formal historical interpretation require further confirmation, so it is recorded here as an observed on-site feature rather than a fully verified historical claim.
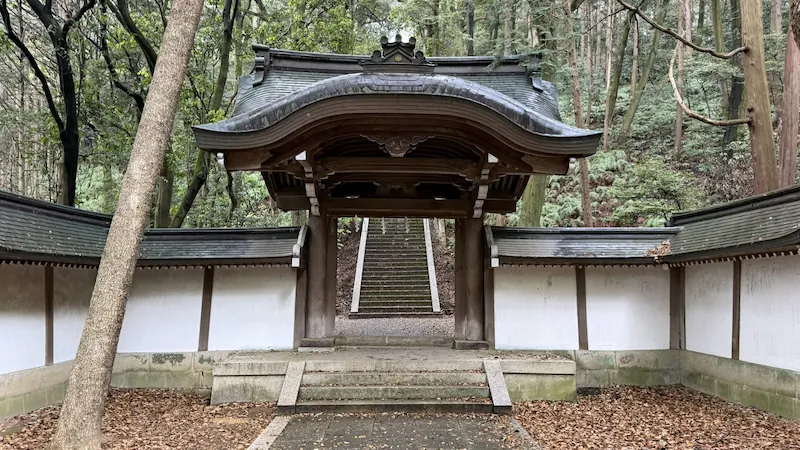
Mid-Slope Gate
中腹の門(仮称) — A gate along the ascent
A gate stands partway up the approach. Its formal name and history are not confirmed in this article, so it is recorded as an observed feature of the route.
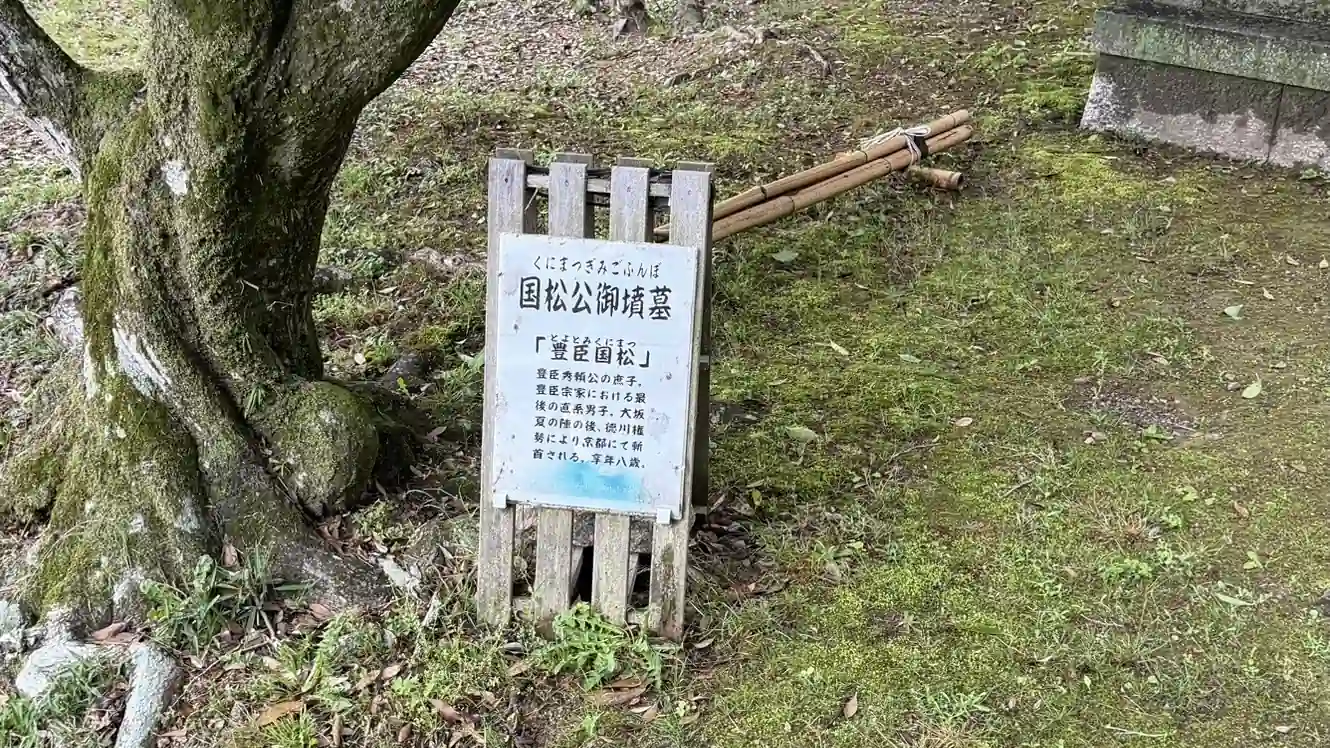
On-site signage during this visit referred to "Kunimatsu Ko no Gobunbo" — a tomb associated with Kunimatsu, son of Toyotomi Hideyori — and a "Hideyori Shrine" (秀頼神殿). These are recorded here as on-site observations only. The formal historical status of these markers requires verification and is not presented here as confirmed historical fact.
Panoramic View — Toward Kiyomizu-dera
墓石脇の眺望 — Kyoto opens up to the left of the grave
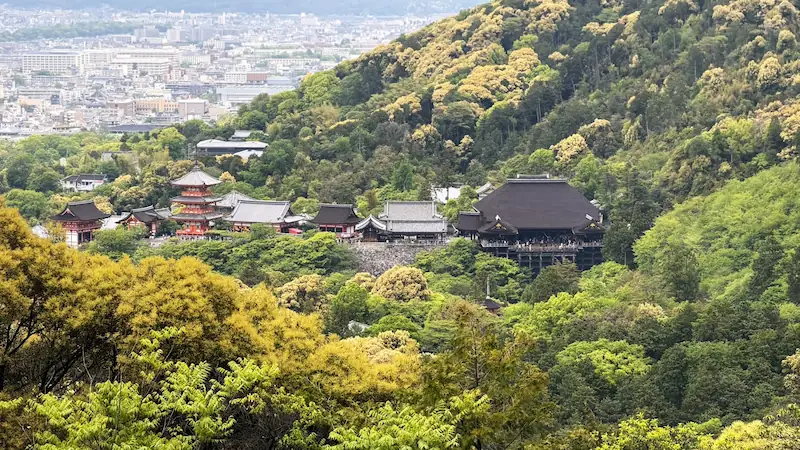
To the left of the grave mound, the hilltop opens to a view of Kyoto below. On this visit, Kiyomizu-dera was visible from this point. The upper area is less tree-covered than the stairway below, making it noticeably brighter and more open.
Based on a visit to the site in May 2026. This is the author's personal ranking, not an official recommendation from Toyokuni Byo.
The reason to climb the stairway at all. The gorinto, built in 1897, dominates the hilltop grave area and is the heart of Toyokuni Byo.
A broad area partway up the approach, with buildings related to goshuin and charms. It sits directly on the route up, so it costs little extra time.
Just steps from the hilltop grave. Whether Kiyomizu-dera is actually visible depends on weather and season, so it is not a guaranteed sight.
Its formal name and history are unconfirmed, so a glance while passing on the stairway is enough.
Practical Details, Timeline and Notes
Practical Visit Information
| Visit time | Approx. 30 minutes for Toyokuni Byo alone on this visit; allow more time if walking slowly or taking photographs |
|---|---|
| Climb | Approx. 10 minutes from stairway base to grave area on this visit for a fast walker |
| Difficulty | Long natural-stone stairway; downhill can be slippery |
Station, bus, parking and admission details are listed in the Access Standard Block above.
Timeline
- 1598: Toyotomi Hideyoshi dies at Fushimi Castle.
- After 1598: Hideyoshi is associated with burial on Mt. Amidagamine.
- 1615: The Toyotomi clan is destroyed in the Siege of Osaka.
- Meiji period: Hideyoshi's memory is revived in official and public contexts.
- 1897: The current visible mausoleum structures, including the gorinto, are built for the 300th anniversary of Hideyoshi's death.
Newspaper Clipping in the Offering Hall
During this visit, a newspaper clipping was posted in the offering hall area, featuring an article about the discovery of remains believed to be Hideyoshi's. This story is recorded here as something observed at the site, not as a verified historical claim.
On-Site Notices — Kunimatsu and Hideyori
- Kunimatsu Ko no Gobunbo: On-site signage referred to a tomb associated with Kunimatsu, son of Toyotomi Hideyori. Details require verification.
- Hideyori Shrine (秀頼神殿): On-site signage also referenced a structure associated with Toyotomi Hideyori. Details require verification.
These are recorded as on-site observations only and are not treated as established historical fact in this article.
The Karamon Gate and Fushimi Castle
Toyokuni Shrine's karamon gate is a National Treasure of Japan dating to the Momoyama period. Local tradition holds that it was originally a gate from Fushimi Castle. Cultural heritage sources describe this as tradition rather than firmly documented fact. This gate is at Toyokuni Shrine — not at Toyokuni Byo.
Combining Toyokuni Byo with Nearby Sites
Toyokuni Byo pairs naturally with nearby Toyotomi-related sites. After descending the mausoleum stairway, you can walk to:
- Toyokuni Shrine: Shinto shrine honoring Hideyoshi. National treasure karamon gate and treasure museum on site.
- Hoko-ji Temple: Site of Hideyoshi's Great Buddha Hall. The famous bell with the "Kokukaanko / Kunshinfuraku" inscription is here.
- Mimizuka / Ear Mound: Memorial mound connected to Hideyoshi's Korean campaigns.
- Sanjusangen-do: Close to Higashiyama Nanajo bus stop.
A practical same-day route: Take a taxi to Toyokuni Byo → climb and visit → walk down to Toyokuni Shrine and Hoko-ji → continue to Sanjusangen-do → return to the city center by bus.
Frequently Asked Questions
Related Articles & Nearby Sites
☕ Support This Site
Following the Shogun is built on original fieldwork and on-site research.
If you found this guide useful, your support helps keep it going.

You can also support via QR code


comment